How to Reset a PowerFlex 753 or PowerFlex 755 to Default
PowerFlex 755 and PowerFlex 753 drives belong to a family of AC drives designed and built by Allen-Bradley/Rockwell Automation. The PowerFlex 750 drive-Series provides an exceptional user experience and high performance from initial programming through the operation. They are used to enhance productivity and flexibility in a wide variety of industrial applications worldwide.

PowerFlex 753 Drive
The PowerFlex 753 drive is built for general-purpose speed and torque control applications with up to 250kW/350Hp power requirements. This drive is available with built-in Input/Output modules, offering multiple features and options along with the additional benefit of simple integration.
For instance, the embedded I/O module in an Allen-Bradley PowerFlex 753 drive consists of three option slots for communications, safety, 24 VDC (volts DC), feedback, or additional I/O cards. This makes the drive a flexible solution for system integrators and machine builders, who are looking to cut down engineering costs and deliver machines to the market much faster. In an effort to meet end-user needs for more productive machines in safety-critical applications. Also, the PowerFlex® 753 AC Drives include a Dual-port EtherNet/IP™ Option Module which provides cost-effective and flexible methods for leveraging EtherNet/IP networks.
PowerFlex 755 AC Drive
The Allen-Bradley PowerFlex 755 drive is designed for speed, positioning, and torque control applications which require up to 2000 Hp/15000kW. This drive is easily integrated with an in-built Ethernet port, and its I/O module has five option slots. The option slots support additional options for auxiliary 24 VDC control power, I/O, feedback, communications, and safety modules. Also, the PowerFlex 755 drive is enhanced with a Dual-port EtherNet/IP™ Option Module which supports Device Level Ring (DRL) functionality for high drive availability and fault-tolerant connectivity. The dual EtherNet/IP option module also supports linear, star, and ring topologies.
In addition, you can integrate a PowerFlex 755 AC drive with a CompactLogix™ or ControlLogix® Programmable Automation Controller (PAC) through embedded drive instructions. This level of integration is only specific to PowerFlex 755 drives over EtherNet/IP networks. The Integrated Motion on EtherNet/IP™ network, allows you to place the PowerFlex 755 drives on the same network as Kinetix® drives. Overall, the PowerFlex® 755 AC Drives are enhanced with multiple hardware and control options, as well as optional in-built safety features which improve the drive’s application flexibility, and ease of use. Hence, you can readily use these drives for a wide range of motor control applications in conveyors, fans, and pumps.
What is a Factory Reset?
A factory reset or resetting a drive to default removes all the user data from the PowerFlex 753 or PowerFlex 755 drive and reverts it to the manufacturer settings; the settings it had when you first acquired it. When you first purchase any of the PowerFlex 750 drives they usually have pre-loaded parameters called default or factory settings, which the manufacturer loads to the drives. This article details the most viable procedure for resetting an Allen-Bradley PowerFlex 753 or PowerFlex 755 drive.
Why Would you Want to Reset your PowerFlex 750 Drive to Default?
The obvious reason for resetting a PowerFlex 750 drive to default would be due to the occurrence of a major fault. A fault is a condition that stops the PowerFlex drive. PowerFlex 753 and PowerFlex 755 drives can experience two types of faults:
(i) Auto-Reset/Run Fault: When this type of fault occurs, the A541[Auto Rstrt Tries] feature is set to a value greater than “0”, which causes the user-configurable timer 1, A542 [Auto Rstrt Delay], to begin. When the time gets to zero, the PowerFlex drive automatically attempts to reset the fault. Once the condition that had caused the fault clears, the fault alarm will be reset and the PowerFlex drive will be restarted. This type of reset is known as a Fault Reset and is quite different from Resetting a drive to default.
(ii) Non-Resettable Fault: This type of fault usually requires the motor or the drive to be repaired, and in other cases, it is caused by programming or wiring errors. Hence, the cause of the fault must first be corrected before the drive can clear the fault alarm. Such fault conditions would necessitate resetting the PowerFlex 750 drive to default. For instance, a fault condition that is caused by programming errors in which you don’t know the already installed parameters would require you to reset the drive to factory settings and reprogram it again. In other cases, a major fault can occur on the drive caused by the drive’s Motor overheating, or Motor Overload trip, or when the motor is controlled by PowerFlex drive is stalled, meaning that the drive is unable to decelerate or accelerate the motor. This being a major fault condition you may be required to reset the drive to default, to repair/ replace the motor.
When you relocate a PowerFlex 755 or PowerFlex 753 drive to a different control panel and you need to program it for other processes or exercises; the first thing you’ll need to do is to reset it to default. You could also be considering selling your PowerFlex 750 drive to someone else, and you don’t want them to access your user-defined programs; in such a case resetting the drive to factory settings would be the only option. Moreover, if your PowerFlex 750 drive is constantly freezing (functions loss) or when the drive isn’t responding properly and you can’t figure out why, an ideal solution would be to restore its settings and configurations to default. Such an action would remove all the files you might be having trouble getting rid of.
What to do Before Resetting a PowerFlex 750 Drive to Default
- Back up all your user programs, and the user-defined settings and configurations for the drive. This cannot be emphasized enough because once you reset a PowerFlex 753 or PowerFlex 753 to default, all your user-defined information will be lost and cannot be recovered. Also, it helps to occasionally back up your drive’s program files, so you don’t waste a lot of time backing up the files when a reset to default is needed urgently.
- Before you reset your PowerFlex 750 drive to default it would be worth encrypting your program files, particularly in cases where you’re resetting the drive to dispose of it or resell it. While the latest versions of PowerFlex 750 drives by Allen-Bradley have security features that could make recovering the user files much harder, encryption adds an extra layer of security which is always useful should the drive get into the wrong hands; especially if the drive is used in critical applications.
How do you Reset a PowerFlex 750 Drive to Default?
Using a Human Interface Module (HMI) you can reset a PowerFlex 753 or a PowerFlex 755 drive to default by following the procedure outlined below. This procedure can also be used to reset the peripherals connected to a PowerFlex 750 drive to factory settings.
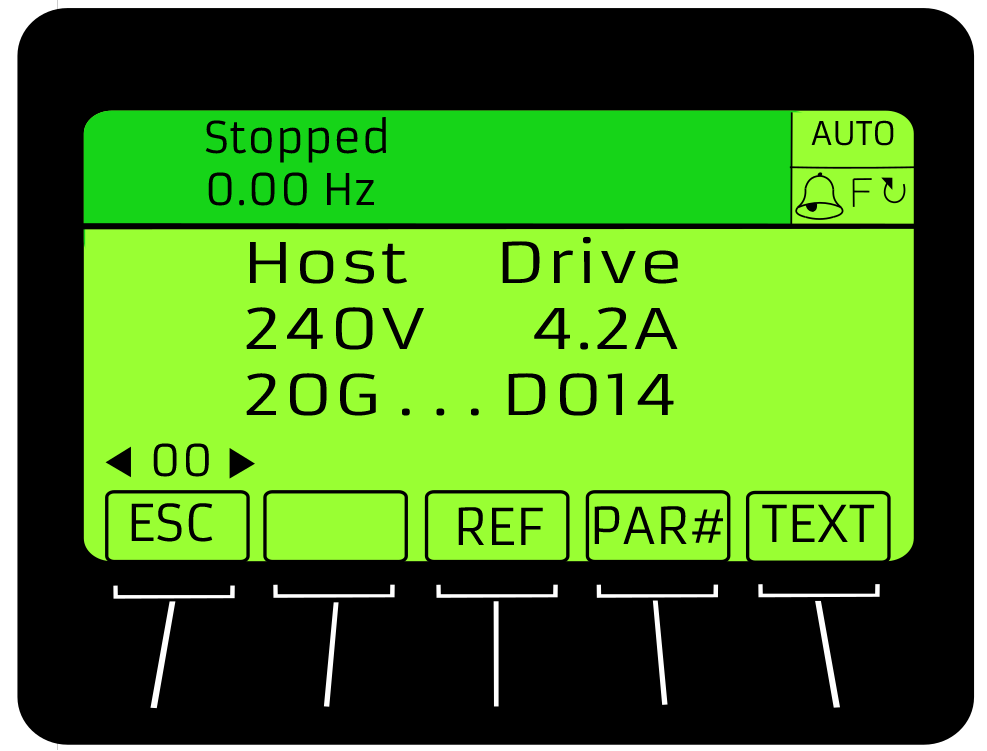
1) First, access the drive’s Status screen (shown below), which is usually displayed on the Human Interface Module (HIM) powerup screen.
2) From the HMI Keypad, use either ◀ or ▶ keys to scroll to the port of the PowerFlex drive whose parameters you want to reset to default (i.e., for the host drive which can either be a PowerFlex 753 or PowerFlex 755 drive select Port 00, or the respective port number for any of the connected peripherals).
3) Press the file key to display the drive’s last-viewed folder. This key can be accessed on the Control screen keypad.
4) Use the “REV” or “FWD” keys on the Control screen function map to scroll to the drive’s MEMORY folder. Note, the number/ navigation keys on the HMI keypad correspond to the keys on the control screen function map. Hence, “REV” key on control screen has the same functionality as the ◀ key on the HMI keypad.
5) To select the “set default” action use the “REF” keys on the control screen or the ▼ or▲ keys on the HMI keypad.
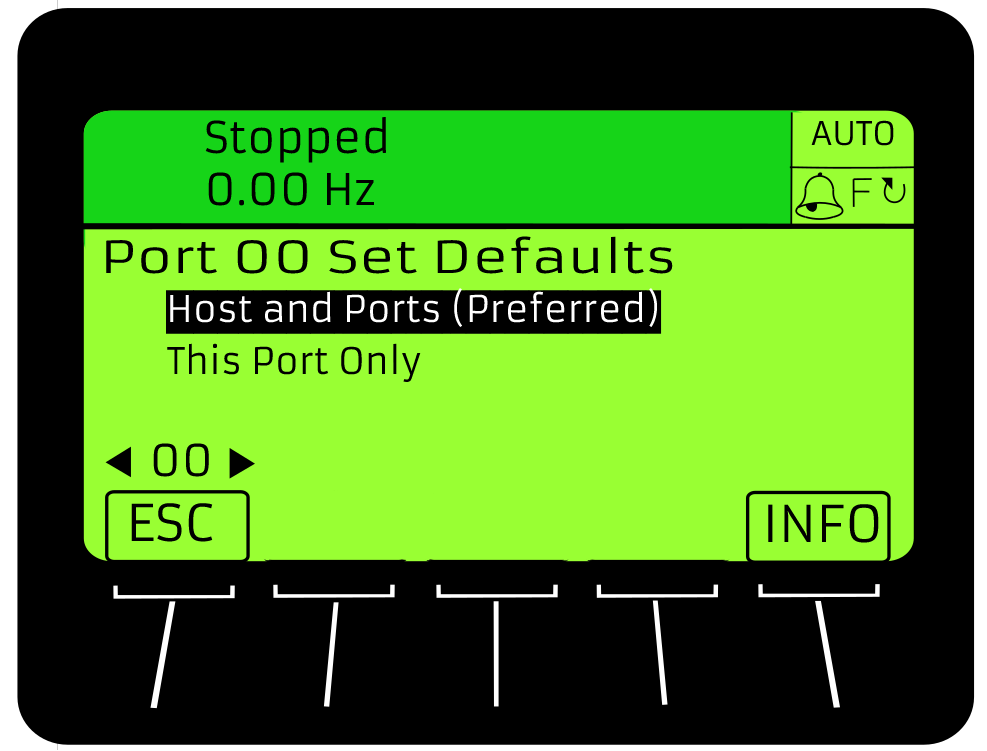
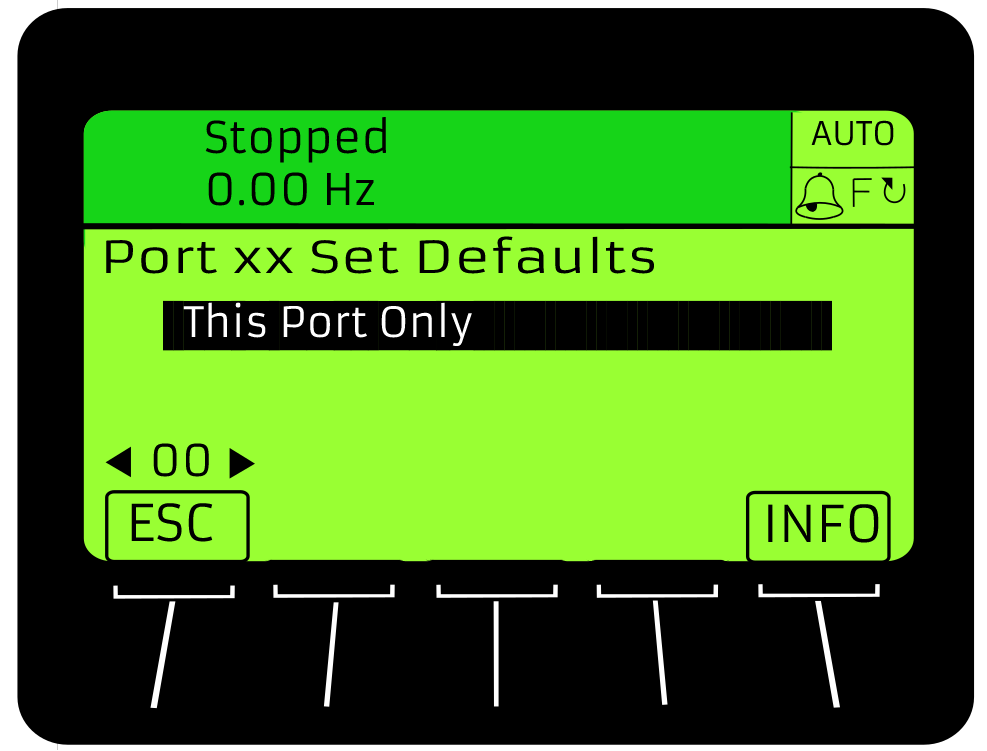
6) To display the “set default” popup box, press the enter key on the HMI keypad. The images below illustrate examples for “set default” popup box for a PowerFlex 750 drive and one for its peripherals.
7) Using the ▼ or▲ keys on the HMI keypad, select the appropriate action:
- Host and Ports (Preferred): Selecting this action will reset the host drive (either PowerFlex 753 or PowerFlex 755) and all other ports to default or factory settings.
- This Port Only: Selecting this action will reset the parameters on this port to Default.
To get a description of a selected menu item, you can press the “INFO” soft key
8) Then, press the enter key on the HMI keypad, this will display the warning popup box to request you to affirm the Set to Default action.
9) Press the “ENTER” soft key on the popup box, this will affirm the Set Default action and set most of the parameters for the PowerFlex 750 drive and its port devices to factory settings.
At this stage, you can check the documentation of the PowerFlex 750 drive and the selected port to see the settings that will not be restored. Alternatively, if you wish to cancel the reset to default action, you can press the “ESC” soft key.
10) If you want to reset specific parameters to default and not the entire drive settings, then press the “MOST” soft key. Prior to this selection, you should have previously selected the “This Port Only” action. In this case, most of the settings for the selected port periphery device will be set to default. You can as well check the documentation for the host PowerFlex drive to note the settings that will not be restored.
Note, when the “MOST” set default action is executed, the following parameters of the PowerFlex 750 drive are not reset to factory settings: P471 [PredMaint Rst En], P306 [Duty Rating], P472 [PredMaint Reset], P300 [Speed Units], P302 [Language], P305 [Voltage Class], and P301 [Access Level] .
11) Therefore, to reset all the parameters of the selected port periphery device to default you can press the “ALL” soft key, instead of pressing the “MOST” soft key. On the other hand, if you wish to exit or cancel the Default setting action, you can press the “ESC” soft key.
An alternative way to using the HMI module to reset a PowerFlex 750 drive to default, could be by pressing the P053[reset to default] button on the drive. This action resets all of the drive’s parameters to their factory default values. After a Rest command, the value of the “Factory Reset” parameter returns to zero. Note, you should first stop your PowerFlex 750 drive, before changing the P053[reset to default] parameter.
A Common Error Encountered when Resetting a PowerFlex 750 Drive to Default
At times you may encounter a “DPI ERROR Object State Conflict” error message when you’re resetting a PowerFlex 753 or PowerFlex 755 drive to default. This error can occur after you select the “set default” action in the Memory folder, followed by the “This Port Only” selection. To correct the error, make sure that that you’re not initially selecting Port 00(Host Drive port), as this would mean that you want to reset the entire drive but you’re selecting a set default action for the connected peripherals. Make sure that the Variable Frequency Drive (VFD) is in Manual Mode and disconnect any implemented communications. Disconnecting implemented communication protocols like EtherNet/IP network ensures that PowerFlex 750 drive’s controller is not continuously writing some of the parameters while you’re trying to reset them to default.
Conclusion
The Allen-Bradley PowerFlex 753 and PowerFlex 755 are innovative AC drives that combine the integration of Control; Communications, Information; Safety features, and Global certifications to enable users to be more productive by receiving more valuable data. In most industrial applications, these drives are required to be up and running all day long (24/7). However, there are some fault conditions and changes to switch the drives’ settings which would require you to reset the drives to default, before the new settings and configurations can take effect. This article provides you with a clearly outlined procedure to perform a set default Action on any of the PowerFlex 750-Series drives.
In conclusion, it is important to note that when performing a set default action, your PowerFlex 750 drive may detect a conflict and then prevent this function from actualizing. Whenever this happens, don’t panic, just resolve the conflict first and then repeat the set default action using the procedure described in this article. As previously discussed, common reasons for a conflict when resetting a PowerFlex 753 or a PowerFlex 755 drive to default would include a controller in Run Mode or the drive itself would still be running. Lastly, after resetting your drive to default, make sure that you power cycle the drive or enter 1 “Reset Module” so that the new values can take effect. Thereafter, the reset module parameter 1 will be restored to the “Ready” parameter with a value of 0. For more information or to discuss which equipment might be best for your application, please visit our website here, or contact us at sales@dosupply.com or +1 (919) 205-4392.
DO Supply Inc. makes no representations as to the completeness, validity, correctness, suitability, or accuracy of any information on this website and will not be liable for any delays, omissions, or errors in this information or any losses, injuries, or damages arising from its display or use. All the information on this website is provided on an "as-is" basis. It is the reader's responsibility to verify their own facts.