PanelView Maintenance Tips: Extending the Life of Your Display
Human-machine interface (HMI) equipment is constantly challenged in industrial settings. Even the most robust components may be affected by dust, temperature changes, electrical noise, and constant use. For operators who rely on Rockwell Automation panel view terminals, a proactive, informed maintenance plan is not merely a suggestion but also a significant factor in ensuring the greatest availability of operational time and the security of a substantial automation investment. This overall manual provides step-by-step technical guidance and best practices to greatly extend the functional life of your PanelView displays, from daily cleaning to end-of-life component maintenance.
Cleaning and Preservation of the PanelView
The main interaction point on every PanelView terminal is the display window, and thus its responsiveness and readability are of paramount importance. A very important though seemingly quite simple maintenance activity is proper cleaning. The wrong method may cause irreparable damage, whereas a responsible practice will keep the optics intact and as sensitive to touch as before.
The key principle of efficient cleaning is to use a protective antiglare overlay. This accessory can also serve as a protective layer, shielding the actual display from scratches, chemicals, and abrasion, making cleaning easier. Turning off the power supply to the PanelView at the source, before beginning any cleaning process, is the most important step. This will prevent electrical shock and will safeguard the terminal’s internal electronics.
The only equipment necessary for general cleaning is a clean sponge or soft, lint-free cloth dampened with a mild soap/detergent solution. Abrasive solvents or stiff-bristled brushes should be avoided at all costs because their use is likely to damage the display surface. Drying the PanelView display with a chamois (or a cellulose sponge) after washing will help prevent water spots. The stubborn objects, such as fresh paint splashes or grease, can easily be wiped with a small amount of isopropyl alcohol (70 percent content). After this, each can be washed with mild soap and then flushed with running water, leaving the PanelView clear again.
Battery Management Across the PanelView Series
One of the most important parts of the PanelView ecosystem is the lithium battery; however, its use varies widely across models. It is critical to understand these differences to ensure proper safety. The battery has a single purpose to provide power to the real-time clock and the static RAM; it is not used as a backup or storage for the application.
The lithium battery is a consumable product that a user replaces in the PanelView 700 to 1500 terminals. On the other hand, the PanelView 400 and 600 terminals include a permanently sealed hermetically sealed lithium battery that is not to be removed by unqualified personnel except at the end of the product life.
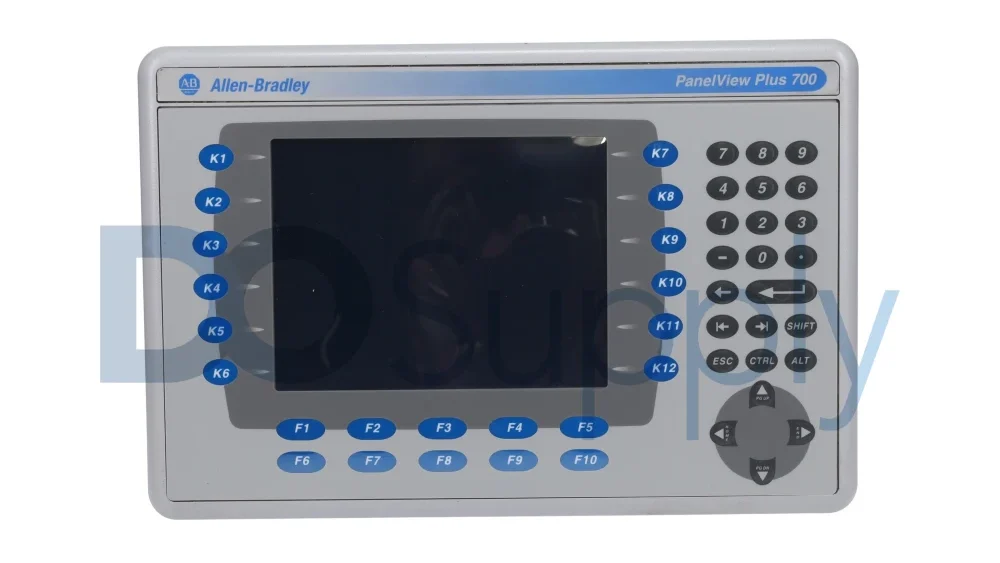
PanelView 700-1500 Battery Replacement Protocol
Changing the battery in the larger PanelView terminals is a very specific task that requires high levels of caution to ensure safety and ESD (electrostatic discharge). The Rockwell Automation Allen-Bradley-approved battery must only be used to prevent the product’s warranty from being nullified and to reduce the risk of fire or explosion.
The replacement process would also start with connecting power to the PanelView. The terminal should be placed on a stable, flat surface with its display visible. The second step is to remove the communication module, if present, by removing the four screws that hold it in place. After this, the six screws that hold the logic module in place should be loosened. The logic module may then be lifted off rather cautiously and inverted to reveal the circuit board.
The ESD wristband should be properly grounded before being worn by personnel when dealing with any internal component. Find the battery on the circuit board and press the edge marked with an arrow to indicate the direction to remove the battery. Install the new, approved battery and make sure it is in the correct position. Remember to place the logic module carefully, align it with the terminal connectors, and press it in place until it is fully seated. The six captive screws are to be clamped to a given level of 0.58 Nm (5-7 lb. in). Lastly, replace the communication module by tightening its four screws.
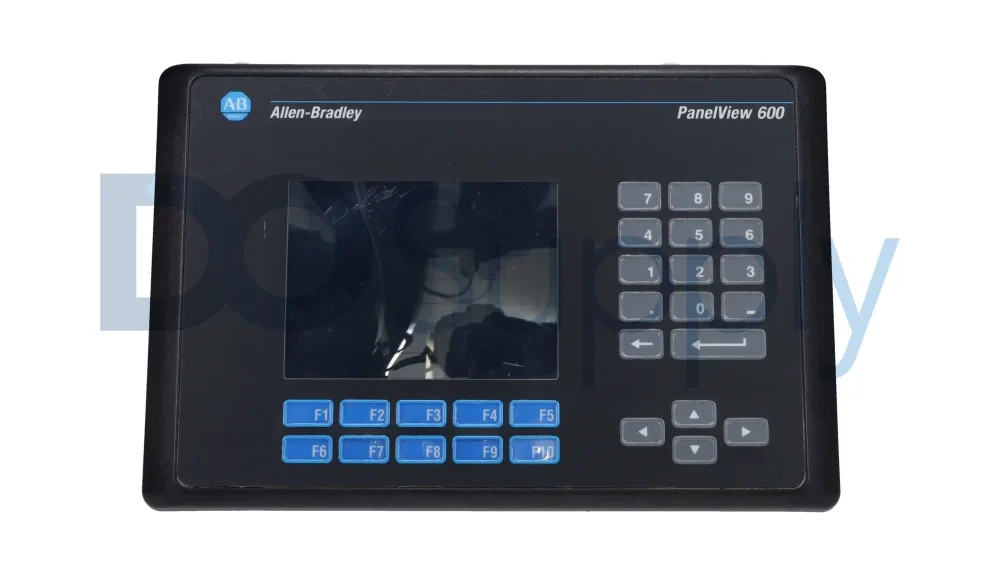
End-of-Life Handling for PanelView 400 and 600 Batteries
For the PanelView 400 and 600, battery replacement is strictly an end-of-life operation. These are more or less like disassembly in other repairs, in which, after disconnecting power, the terminal is manually displayed side down. Loosen the three screws holding the communication module. The back cover is then detached by unscrewing eight retaining tabs (two per side), which allow access to the logic board containing the yellow battery. This battery and the complete backlight assembly in 600 to 1500 PanelView terminals that use mercury should be disposed of separately from unsorted municipal waste.
Troubleshooting for Common PanelView Issues
The systematic approach to troubleshooting is one of the main factors in quickly restoring the PanelView’s functionality. Symptoms are common and have a rational explanation, which can be diagnosed without hardware replacement in a timely manner.
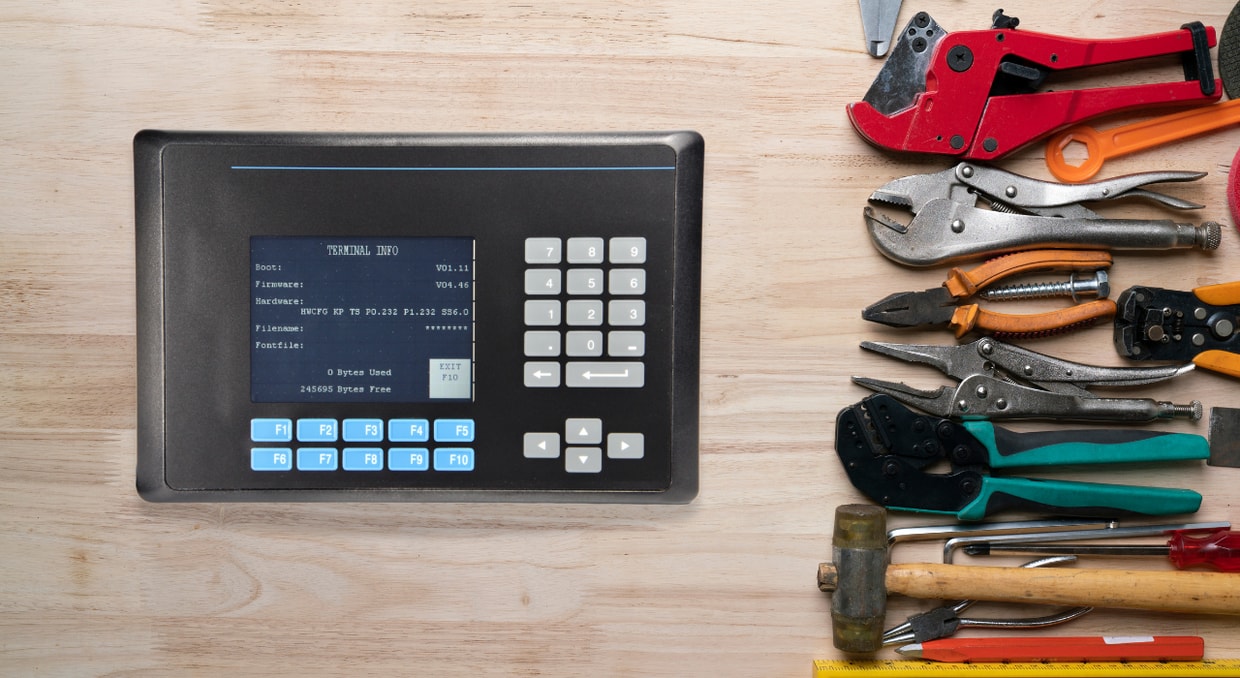
One of the most common problems is failure to update on-screen values and display them as asterisks (****). This normally indicates a communication issue between the PanelView and the controller, or that the displayed value exceeds the field width assigned to the object. The first steps in diagnostics are to check the COMM status indicator and the object’s configuration in the application.
The other prevalent issue is failure to access the PanelView configuration mode. If the standard key combination fails, the arrow keys are often assigned to the active screen object’s functions, preventing system-level use.
Where the objects on the screen are not visible, a systematic verification of the power connections, contrast, and the saver setting mode is necessary. The absence of a working backlight could also indicate a totally blank screen, which must be replaced. For problems associated with application files, including an invalid file name appearing on the terminal information screen, the remedy is to re-download a valid application to the PanelView.
Memory card errors, e.g., an invalid format or a broken data checksum, may involve confirming that the card is installed, setting it to write protection or off, verifying the application’s file size is correct, and possibly just trying another or reformatting it. Communication errors require verification that the panel view and associated devices are configured to the appropriate communication rates, the node addresses, and that the communication drivers are configured.
Best Maintenance and Operational Practices for the PanelView
To maximize the lifespan of a PanelView terminal, proactive maintenance is far more effective than relying solely on reactive repairs.
Regular cleaning should extend beyond the display itself to include the entire enclosure. Dust buildup inside or around the unit can restrict airflow, reduce ventilation efficiency, and eventually lead to overheating. On models equipped with fan filters, having a scheduled maintenance and service routine is especially important. Adjusting display settings such as brightness and intensity also plays a role. Proper tuning improves visibility while reducing long-term stress on the display components.
Environmental conditions matter just as much. Keeping the PanelView within its specified temperature and humidity ranges helps prevent a wide range of issues that may not be immediately obvious but can shorten the terminal’s lifespan over time. Maintaining a detailed maintenance log, including cleaning intervals, updates, and component replacements, creates a useful service history. This record can simplify troubleshooting, reveal recurring issues, and support better preventive maintenance decisions down the road.
Final Thoughts
The PanelView terminal serves as the direct link between the operator and the control system, making its reliability critical to both production efficiency and system visibility. When it performs well, operators can make faster decisions and respond more effectively to process changes.
By following structured maintenance, troubleshooting, and component-replacement practices, maintenance efforts shift from reactive fixes to a more proactive, strategic approach. Whether it’s routine cleaning or more involved tasks like replacing an approved battery and properly handling hazardous materials, each step contributes to the PanelView’s long-term health and performance. Taken together, these practices help protect your investment and ensure the display continues to deliver consistent, reliable service for years to come.
For all of your PanelView needs, come by our store and check out our selection of ready-to-ship terminals! We also offer our repair services for PanelViews that are broken or damaged, all backed by our two-year warranty. If that sounds like something you need, feel free to give us a call or send us an email today so we can help! If you are here to learn more about these terminals, we have another blog comparing the PanelView to the VersaView here as well.
DO Supply Inc. makes no representations as to the completeness, validity, correctness, suitability, or accuracy of any information on this website and will not be liable for any delays, omissions, or errors in this information or any losses, injuries, or damages arising from its display or use. All the information on this website is provided on an "as-is" basis. It is the reader's responsibility to verify their own facts.